Purpose
To construct a homemade windmill
Additional information
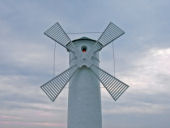
A windmill in a tall structure that converts wind into energy. Windmills were invented in eastern Persia as early as the 9th century and were often developed for using in milling grains for means of food production. In modern days, wind turbines (a form of windmill) are used to generate electricity.
Sponsored Links
Required materials
- Half-gallon milk or juice container (the paper kind, not the plastic kind)
- Rocks or sand
- Sharp pencil or pen
- Straight straw (do not use the ones that bend at the top)
- Wine bottle cork
- Pinwheel toy
- Paperclip
- White thread
Estimated Experiment Time
25 - 30 minutes
Step-By-Step Procedure
- 1. Wash the inside of your 1/2 gallon carton with warm water. Rinse several times and leave upside-down to dry.
- 2. Once the carton is dry, turn it up-right and place your sand or rocks in the opening at the top. You'll want to put enough sand or rocks so that it fills the container about 1/3 of the way to form a sturdy base.
- 3. Using your pencil or pen, poke a hole in the carton about half way up from the base. Make sure the pencil or pen pokes through to the other side of the carton, forming two parallel holes at the same height. Your windmill base is now complete!
- 4. Push one end of your plastic straw into the middle of your wine cork, making sure it has a tight enough fit that the cork does not slide off. NOTE: Depending on the strength of your straw, you may need to push partially into the cork with your pencil or pen to carve out a circle.
- 5. Insert the straw through the parallel holes on your carton. Push the straw as far as it will go.
- 6. Using a paperclip (or super glue), attach the pinwheel toy to the end of the straw that does not have the cork attached to it. The pinwheel needs to be attached so it does not slide off from the straw, but still must spin freely.
- 7. Cut a length of thread that is between 24 - 36 inches in length and tie one end to the cork. Tie the other loose end to a paperclip.
- 8. Your windmill is now complete! Blow on the pinwheel and observe what happens to the paperclip attached to the thread.
Note
Pinwheels can be found at your local toy store or dollar store. Finding the right size pinwheel is important. Too small and the pinwheel may not be able to turn when blowing on it, too large and it may cause your windmill to topple. Go medium.
Observation
As you blow on the pinwheel, the pinwheel spins causing the thread to wrap around the cork. As the thread wraps around the cork, the paperclip moves upward and then back down after it's gone through enough rotations to have wrapped the entire thread.
Result
Typical windmills are made up of a base, a shaft, blades, and a generator. The base (milk or juice carton) is the structure vertical structure that is planted to the ground. The shaft (your straw) is the piece that holds the blades to the windmill base. The blades (pinwheel) are what generates energy through rotation. Another key component to a windmill that is absent from the experiment is the generator. The generator is the component that converts the mechanical energy of the rotating blades into electricity. Your paperclip attached to the cork is used to illustrate how the spinning blades of the windmill generate wind energy.
Sponsored Links
Take a moment to visit our table of Periodic Elements page where you can get an in-depth view of all the elements,
complete with the industry first side-by-side element comparisons!